Cpu Vdd Voltages – Safe Limits & Optimization!
Learn how to handle CPU VDD voltage for better performance and stability. Optimize your CPU with the right settings to prevent overheating and extend lifespan.
In this article, we explain CPU VDD voltage, its impact on performance, and how to adjust it safely. Learn the best practices for undervolting and overclocking while maintaining system stability. Follow our step-by-step guide to optimize voltage settings and prevent overheating or hardware damage.
What is CPU VDD Voltage?
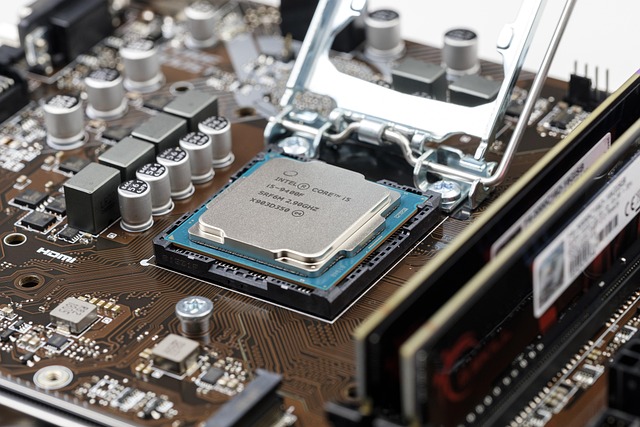
The VDD voltage (often labeled as CPU Vcore or VDDCR CPU in BIOS/UEFI) is the primary power supply voltage delivered to the CPU cores. It determines the electrical potential needed for the processor to function properly.
- A higher VDD voltage allows for increased clock speeds (useful in overclocking).
- A lower VDD voltage reduces power consumption and heat output, improving efficiency.
However, incorrect voltage settings can lead to instability, overheating, and permanent CPU damage. Thus, it’s important to adjust VDD voltage carefully, keeping it within safe limits recommended by the CPU manufacturer.
Safe CPU VDD Voltage Ranges:
Different processors have different safe operating voltages. The safe VDD voltage range depends on factors like CPU model, manufacturing process, and cooling solution. Below are general guidelines for common CPU brands:
AMD Ryzen CPUs:
- Stock Voltage: ~1.1V to 1.3V
- Safe Overclocking Voltage: ~1.3V to 1.4V
- Risky/High Voltage: 1.45V+ (may degrade CPU lifespan)
Intel Core CPUs:
- Stock Voltage: ~1.0V to 1.25V
- Safe Overclocking Voltage: ~1.25V to 1.35V
- Risky/High Voltage: 1.4V+ (can cause overheating and long-term damage)
These values may vary depending on the specific CPU model and silicon quality (also known as the silicon lottery). Always check manufacturer guidelines before making adjustments.
How to Adjust CPU VDD Voltage in BIOS/UEFI?
To safely change the CPU VDD voltage, you must access your motherboard’s BIOS or UEFI settings. Here’s a step-by-step guide:
Step 1: Enter BIOS/UEFI!
- Restart your computer.
- Press the BIOS key (usually Del, F2, or F10) during boot-up.
- Navigate to the Overclocking or Voltage settings section.
Read More: What Is The Cpu Cycle – A Comprehensive Guide!
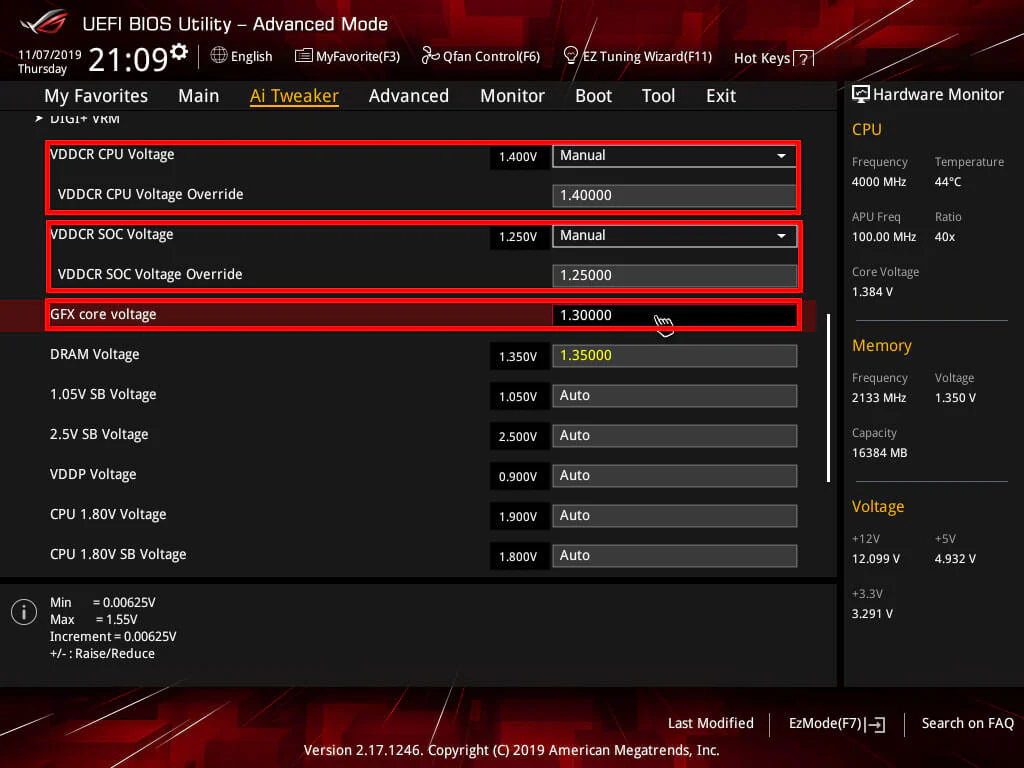
Step 2: Locate CPU VDD Voltage Settings!
- Look for settings labeled CPU Vcore, VDDCR CPU, or Core Voltage.
- Some motherboards have an Auto mode, which dynamically adjusts voltage based on CPU load.
Step 3: Adjust Voltage Manually!
- For undervolting (reducing voltage for efficiency), lower the voltage by small increments (e.g., -0.05V).
- For overclocking, increase the voltage slightly (e.g., +0.05V) and test for stability.
- Never exceed the maximum safe voltage recommended for your CPU.
Step 4: Save and Test Stability!
- Save changes and restart your PC.
- Run stress-testing tools like Prime95, Cinebench, or AIDA64 to ensure stability.
- If the system crashes or becomes unstable, adjust the voltage accordingly.
Risks of Incorrect CPU VDD Voltage Settings:
Modifying the CPU VDD voltage can have both positive and negative effects. Here are the potential risks:
1. Overvolting (Too High Voltage):
- Increased heat output: Higher voltages cause excessive heat, requiring better cooling solutions.
- Reduced CPU lifespan: Continuous exposure to high voltage can degrade the processor over time.
- System instability: Overvolted CPUs may crash if the motherboard’s VRM (Voltage Regulator Module) cannot supply stable power.
2. Undervolting (Too Low Voltage):
- Performance drops: If the CPU doesn’t receive enough voltage, it may throttle or crash under heavy workloads.
- Boot failures: Too low a voltage can prevent the system from starting properly.
Balancing voltage correctly ensures optimal performance and longevity without unnecessary risks.
Best Practices for Optimizing CPU VDD Voltage:
1. Use Adaptive or Offset Mode:
Many modern motherboards offer adaptive or offset voltage settings, which allow dynamic voltage scaling. This helps reduce power consumption when the CPU is idle while still providing enough power under load.
2. Monitor CPU Temperatures:
Keeping your CPU temperatures in check is crucial when adjusting VDD voltage. Use monitoring software like:
- HWMonitor
- HWiNFO
- Core Temp
Ensure temperatures stay below 80°C under load for long-term CPU health.
Read More: Bad Cpu Type In Executable – Step-by-Step Guide!
3. Stress Test After Every Adjustment:
After modifying the CPU VDD voltage, always perform stability tests using:
- Prime95 (for extreme stress testing)
- Cinebench (for real-world performance testing)
- AIDA64 (for thermal and stability analysis)
If you experience crashes, blue screens, or system instability, tweak the voltage accordingly.
4. Keep VRM and Power Supply in Mind:
A high-quality motherboard with strong VRMs (Voltage Regulation Modules) ensures stable power delivery. Similarly, a reliable power supply unit (PSU) prevents voltage fluctuations that could affect CPU performance.
5. Avoid Extreme Voltages:
While it may be tempting to push higher voltages for better overclocking, always prioritize long-term reliability over minor performance gains. Exceeding 1.4V on Intel or 1.45V on AMD Ryzen can significantly shorten your CPU’s lifespan.
FAQ’s
1. What is CPU VDD voltage, and why is it important?
CPU VDD voltage (also known as CPU Vcore) is the primary power supply to the processor cores. It directly affects performance, power consumption, and system stability.
2. What is the safe voltage range for overclocking a CPU?
For AMD Ryzen, safe overclocking voltage is 1.3V to 1.4V, while for Intel Core CPUs, it’s 1.25V to 1.35V. Exceeding 1.4V (Intel) or 1.45V (AMD) may reduce CPU lifespan.
3. Can undervolting the CPU improve performance?
Yes, but only if done correctly. Undervolting reduces heat and power consumption, allowing the CPU to maintain higher clock speeds under load without thermal throttling.
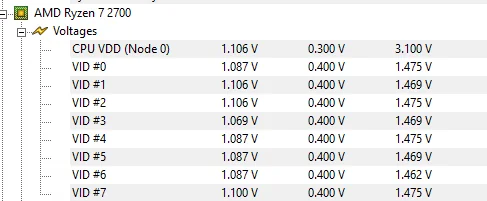
4. How do I check my CPU VDD voltage in Windows?
Use monitoring tools like HWMonitor, HWiNFO, or CPU-Z to check real-time CPU VDD voltage and ensure it remains within safe limits.
5. What happens if I set CPU VDD voltage too low?
Setting VDD voltage too low can cause system instability, crashes, or boot failures, as the CPU may not receive enough power to function properly. Always lower voltage in small increments and test for stability.
Conclusion:
Handling CPU VDD voltage requires a careful balance between performance, efficiency, and stability. Undervolting can reduce power consumption and heat, improving system longevity, while overclocking can enhance speed but increases thermal output and power demands. To optimize your CPU safely, it’s crucial to understand recommended voltage limits, monitor temperatures, and use BIOS/UEFI settings effectively. Using tools like HWMonitor or CPU-Z helps track voltage changes in real time. Proper adjustments ensure smooth performance without risking hardware damage or instability.